How to make a friendship band
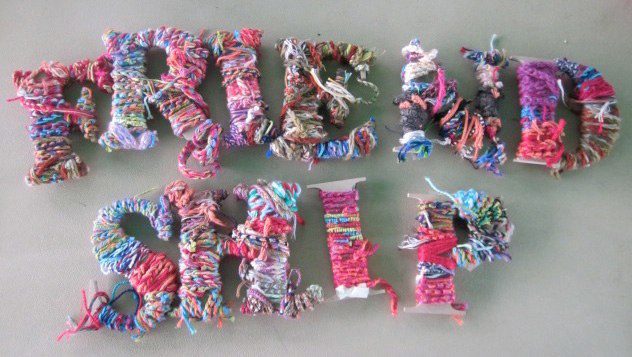 There are many different types of friendship bands. We are going to show you how to make some of them.
Some are easy, some are difficult. Either way you can help. You have the opportunity to make many or just one.
They may seem really complicated at first but all of us find them quite easy now that we've made a few. You might even find it quite addictive.
Watch our video to see some ways to create whacky and wild friendship bands. (Showing it to most people is a whole lot easier than learning through written instructions – a bit like learning a dance!)
Step-by-step instructions for making a basic band
What you will need
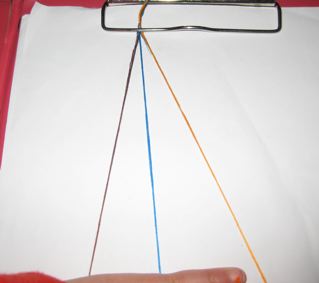
Three strings of different coloured cotton or wool each about 60 cm long.
What to do
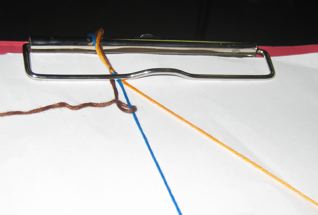
- Lay out the three strings and tie a knot 4 cm from the top. We call whichever string is on the far left the LEAD!
- Find some way to hold the knot down, eg. Clipboard, safetypin on jeans, pin on cork board,stickytape down or secure with butcher clip ( see above).
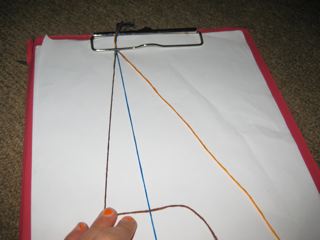
- With your right hand hold the middle string tight and make a basic knot onto it with the LEAD string (on the far left).
How to make a basic knot
- Make a capital L with the LEAD string on top of the middle string.
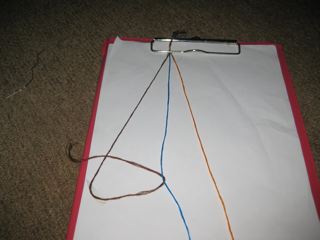
- Now pull the right end of the LEAD string (that right point of the capital L) under the middle string and pull upwards until it makes a knot at the top. Remember to hold the middle string tight with your right hand. Pull the knots quite firmly. You will get a good feel for it as you make some bands.
- Repeat it once. You have now made two basic knots on the middle (blue) string with the first (brown) string.
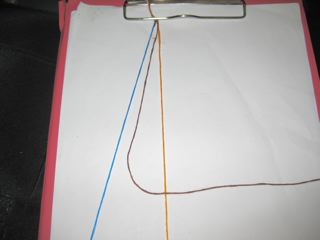
- Continue using the same first (brown) string and make two knots on the 3rd (orange) string, the far right string. This completes a row of one colour. You will now repeat the process over and over with different strings.
- Repeat steps 3 and 4 with the next coloured string which will be waiting on your left. Actually it will be the old middle string (blue) and you will be tying the knot onto the now middle orange string ( the old far right).
- Continue repeating steps 3 and 4 with each next far left string as the lead until the pattern is approximately 15 cm in length.
- Tie a knot to finish the band off
Try the friendship band on your wrist or ankle. There should be enough extra room that you can fit about 1- 2 fingers in next to your wrist or ankle.
Please note that the bracelet can shrink in water or become too tight although it will stretch back out when dry.

Contact us
127 Coolowie Rd,
Terrey Hills NSW 2084
Find us on Google Maps
Primary: +61 2 9450 0738
Preschool: +61 2 9486 3018
Email Kinma